
Jims Locations
Introduction

Jim’s Locations v1.4.0
Jim’s Locations is the central plugin that powers how Jim’s Group websites manage services, locations, and franchises inside WordPress. It keeps all business divisions consistent, connects with external systems, and ensures every page (from suburbs to franchises for sale) is automatically generated and properly optimized for search engines.
Jim’s Locations connects WordPress with FMS and automatically creates location and franchise pages on the website. This manual will guide you step by step through those settings pages.
1. Installing Jim’s Locations
- Log in to WordPress Admin
- Go to your website’s admin panel:
jimsexample.com.au/wp-admin.
- Go to your website’s admin panel:
- Go to Plugins → Add New → Upload Plugin
- Click Upload Plugin at the top.
- Choose the
jims-locations.zipfile provided by Infotech. - Click Install Now.
- Activate the Plugin
- Once installed, click Activate Plugin.
- You’ll now see a new menu item in the left sidebar called Jim’s Locations.
⚠️ Important: If your site uses caching (plugin or server cache), clear it after activation so new pages and settings show up correctly
If options do not appear correctly, contact Infotech to whitelist your website’s IP.
Quick Tip: If something looks broken (missing pages, 404 errors, or wrong slugs), the two most useful tools are:
- Update URL Routing (General Settings → button on the right)
- Clear Cache (General Settings → button on the right)
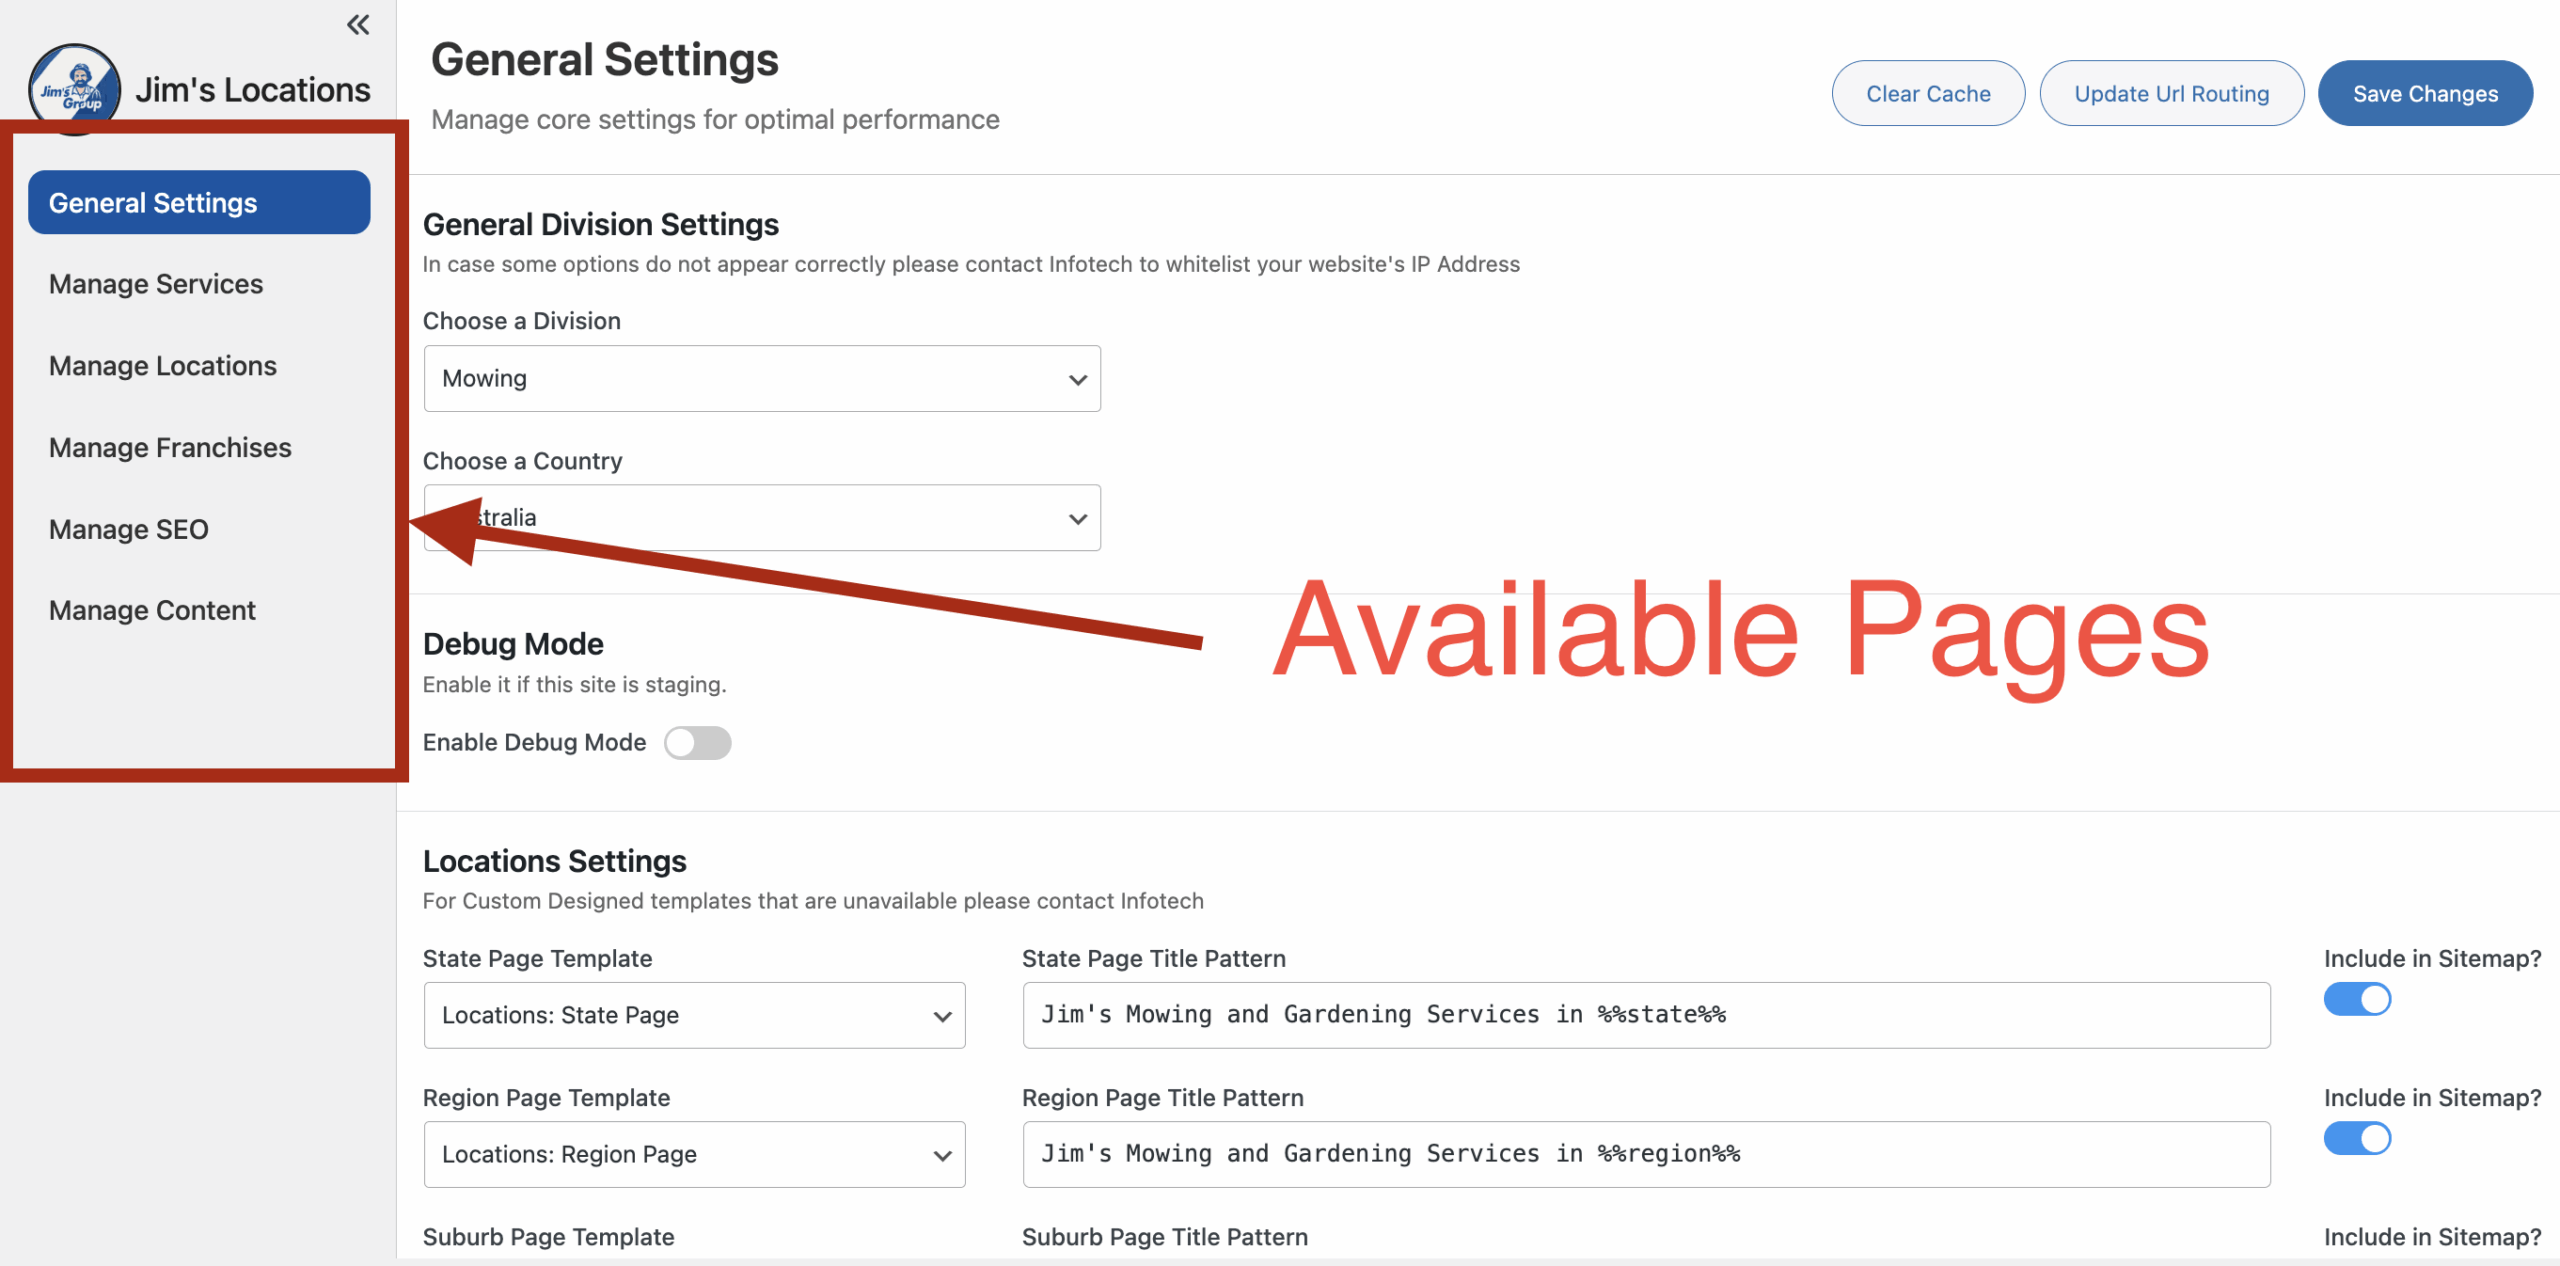
2. General Settings (the foundation)
This is the first place you should configure after installing Jim’s Locations.
It controls which division/country your site belongs to, how page titles and SEO metadata are built, and which external systems the plugin connects to.
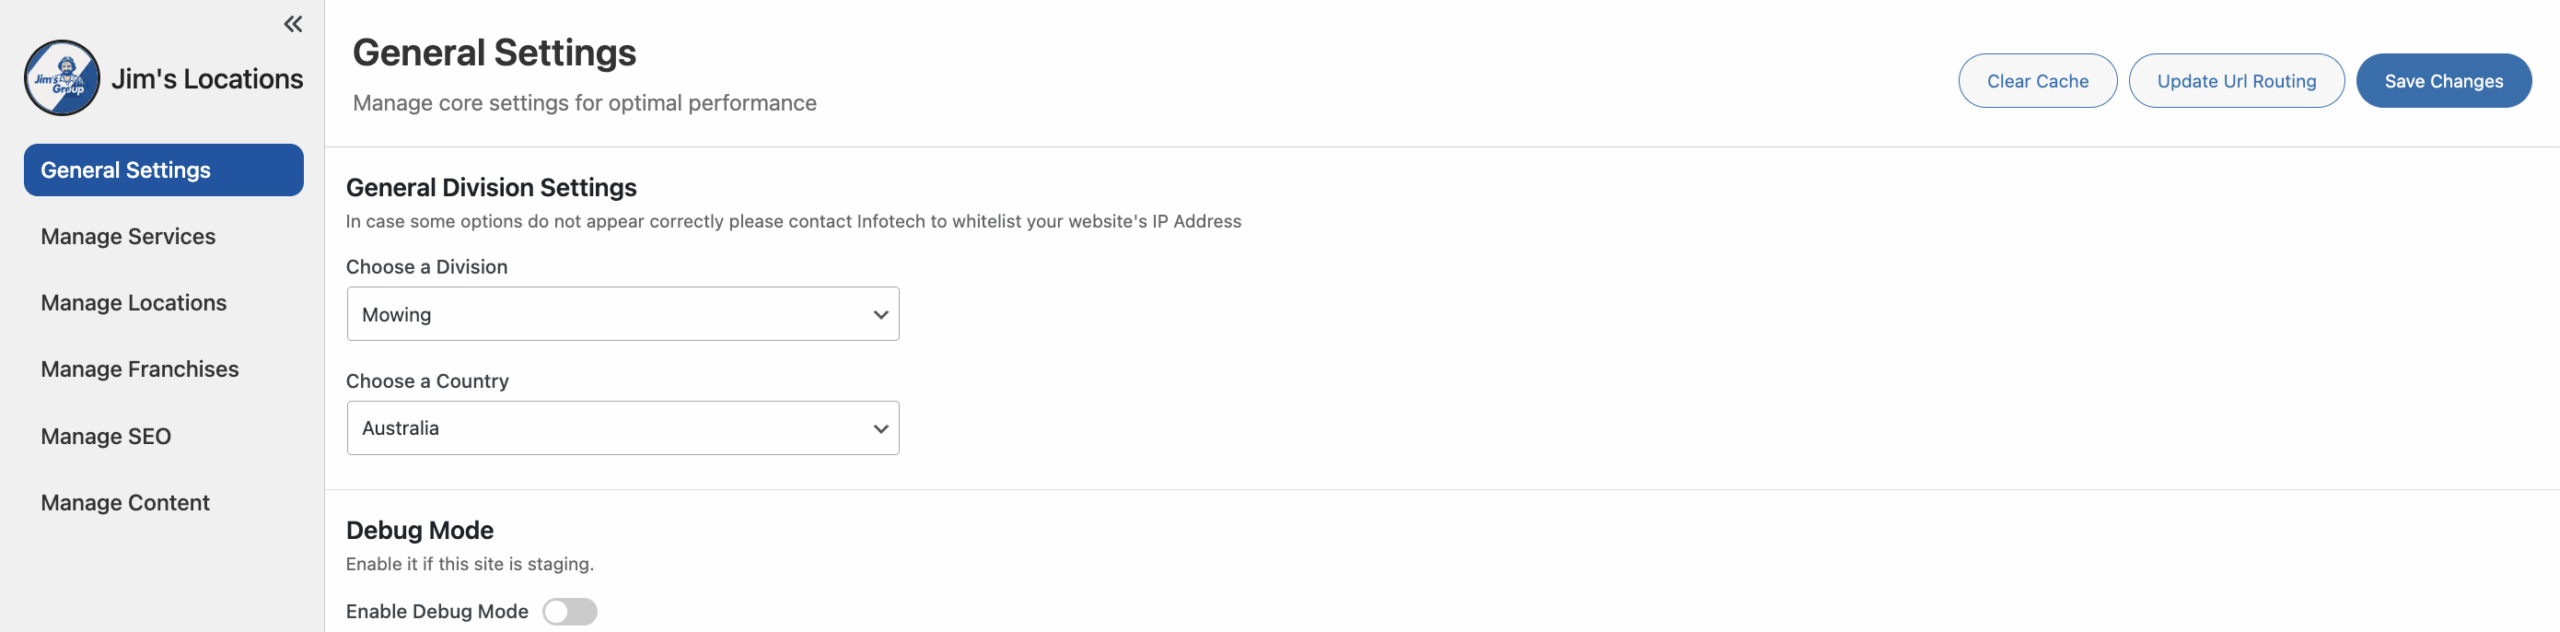
General Division Settings
- Division → Select which Jim’s division this site belongs to (e.g., Jim’s Mowing, Jim’s Cleaning).
- Country → Select the country (e.g., AU, NZ, UK).
👉 These two choices filter all data (services, franchises, locations).
Debug Mode
- Enable Debug Mode → Normally OFF.
- Switch ON only if Infotech support asks you. It shows extra technical information for troubleshooting.
Locations Settings (per Page Type)
This lets you control how different page types appear.
For each type (State, Region, Suburb, Franchise, Service+Location, Franchise for Sale, etc.):
- Template → Pick which WordPress template layout to use for this page type.
- Page Title Pattern → Defines how the page title (browser tab + SEO title) is generated.
- Example:
{{service}} in {{location}} | Jim's {{division}}.
- Example:
- Include in Sitemap → Toggle whether this page type is included in the XML sitemap.
Meta Descriptions (per Page Type)
Here you can define the default SEO description for each page type.
- Aim for 140–160 characters.
- Keep them clear and relevant.
- Example: “Jim’s Mowing offers lawn care in {{location}}. Reliable, professional, and backed by Jim’s Guarantee.”
Connectivity
- Google Maps API Key → Enter your Google Maps JavaScript API key.
- Needed for displaying maps and coordinates.
- If you see broken maps or console errors, your key is missing/invalid.
“Find a Jim” Version & Auto-Update
Controls which backend environment the plugin connects to.
- Find a Jim Version
- Local / Docker → For developers only.
- Staging → For test sites before going live.
- Production → For live websites (recommended).
- Auto-Update → If ON, the plugin will automatically fetch updates from Infotech.
- Version Type
- Stable → Default and safest choice (tested releases).
- Early → Experimental features (only use if directed).
Utility Buttons
- Save Changes → Saves all settings on this page.
- Clear Cache → Deletes stored cached data so updates show immediately. Use after big edits.
- Update URL Routing → Refreshes WordPress permalinks. Use after changing slugs, adding many new services, or when you get 404 errors.

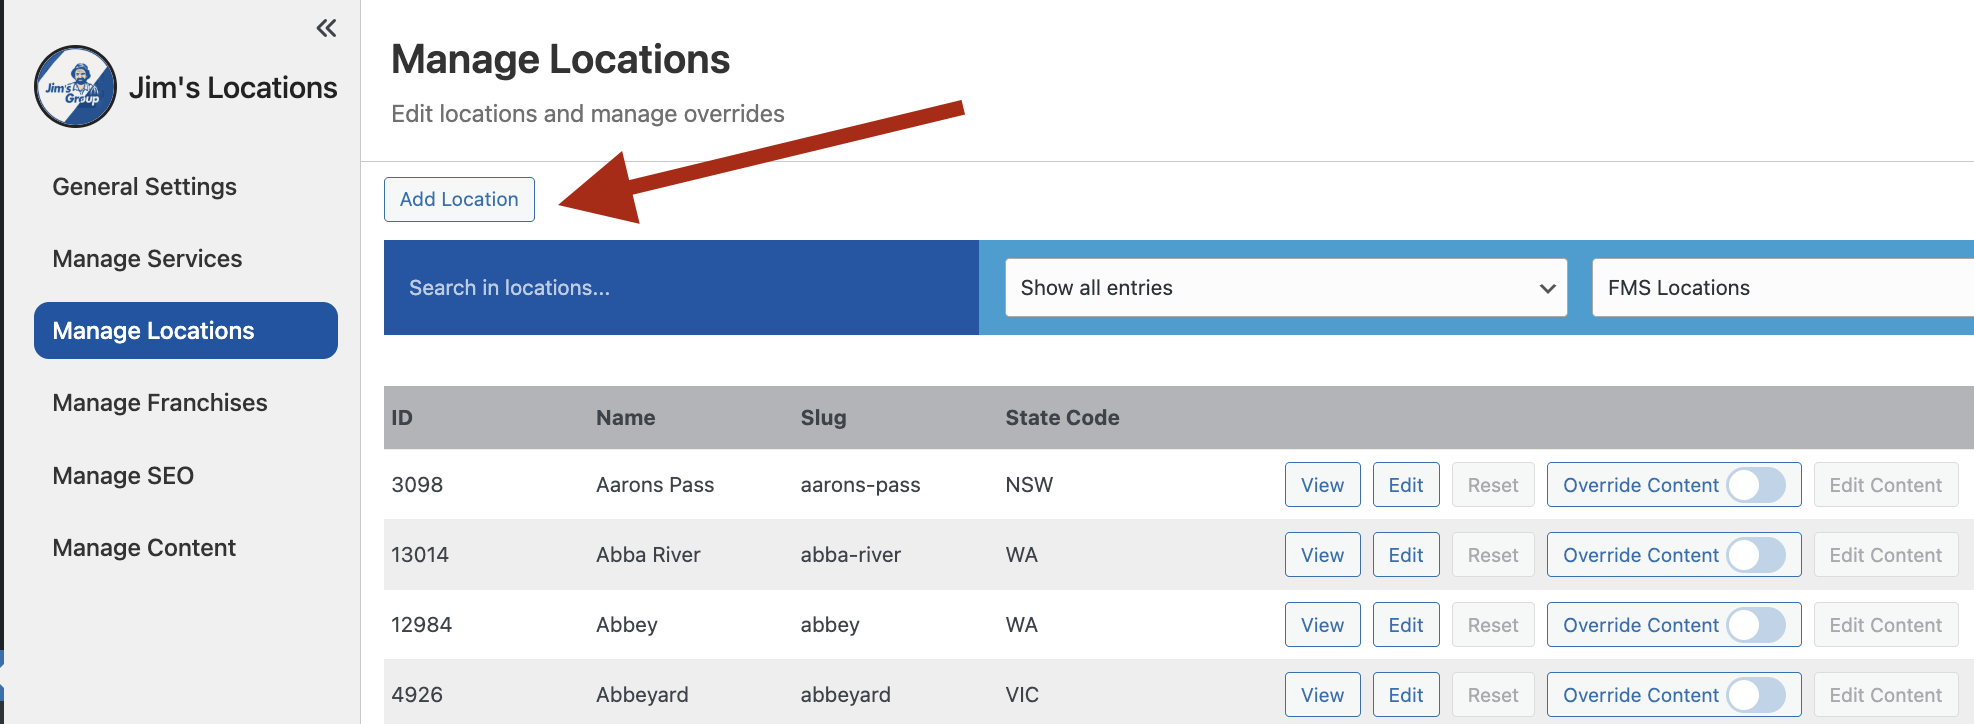
3. Manage Locations
The Manage Locations page is where you can view and maintain the list of locations displayed across the Jim’s website.
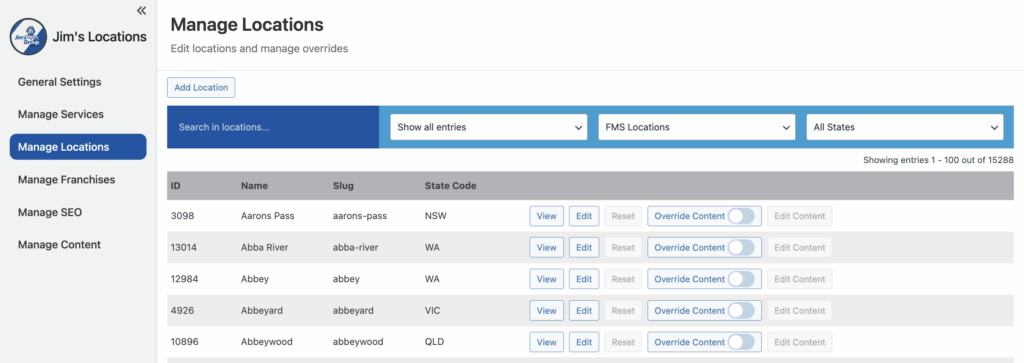
Automatically Generated Locations
- The list of locations is pulled directly from FMS.
- Locations are created dynamically based on where franchisees and services are available.
Editing an Existing Location
When you click Edit on an existing location in the Manage Locations list, you’ll be taken to the Edit Location page where you can update any of the available information about a Location
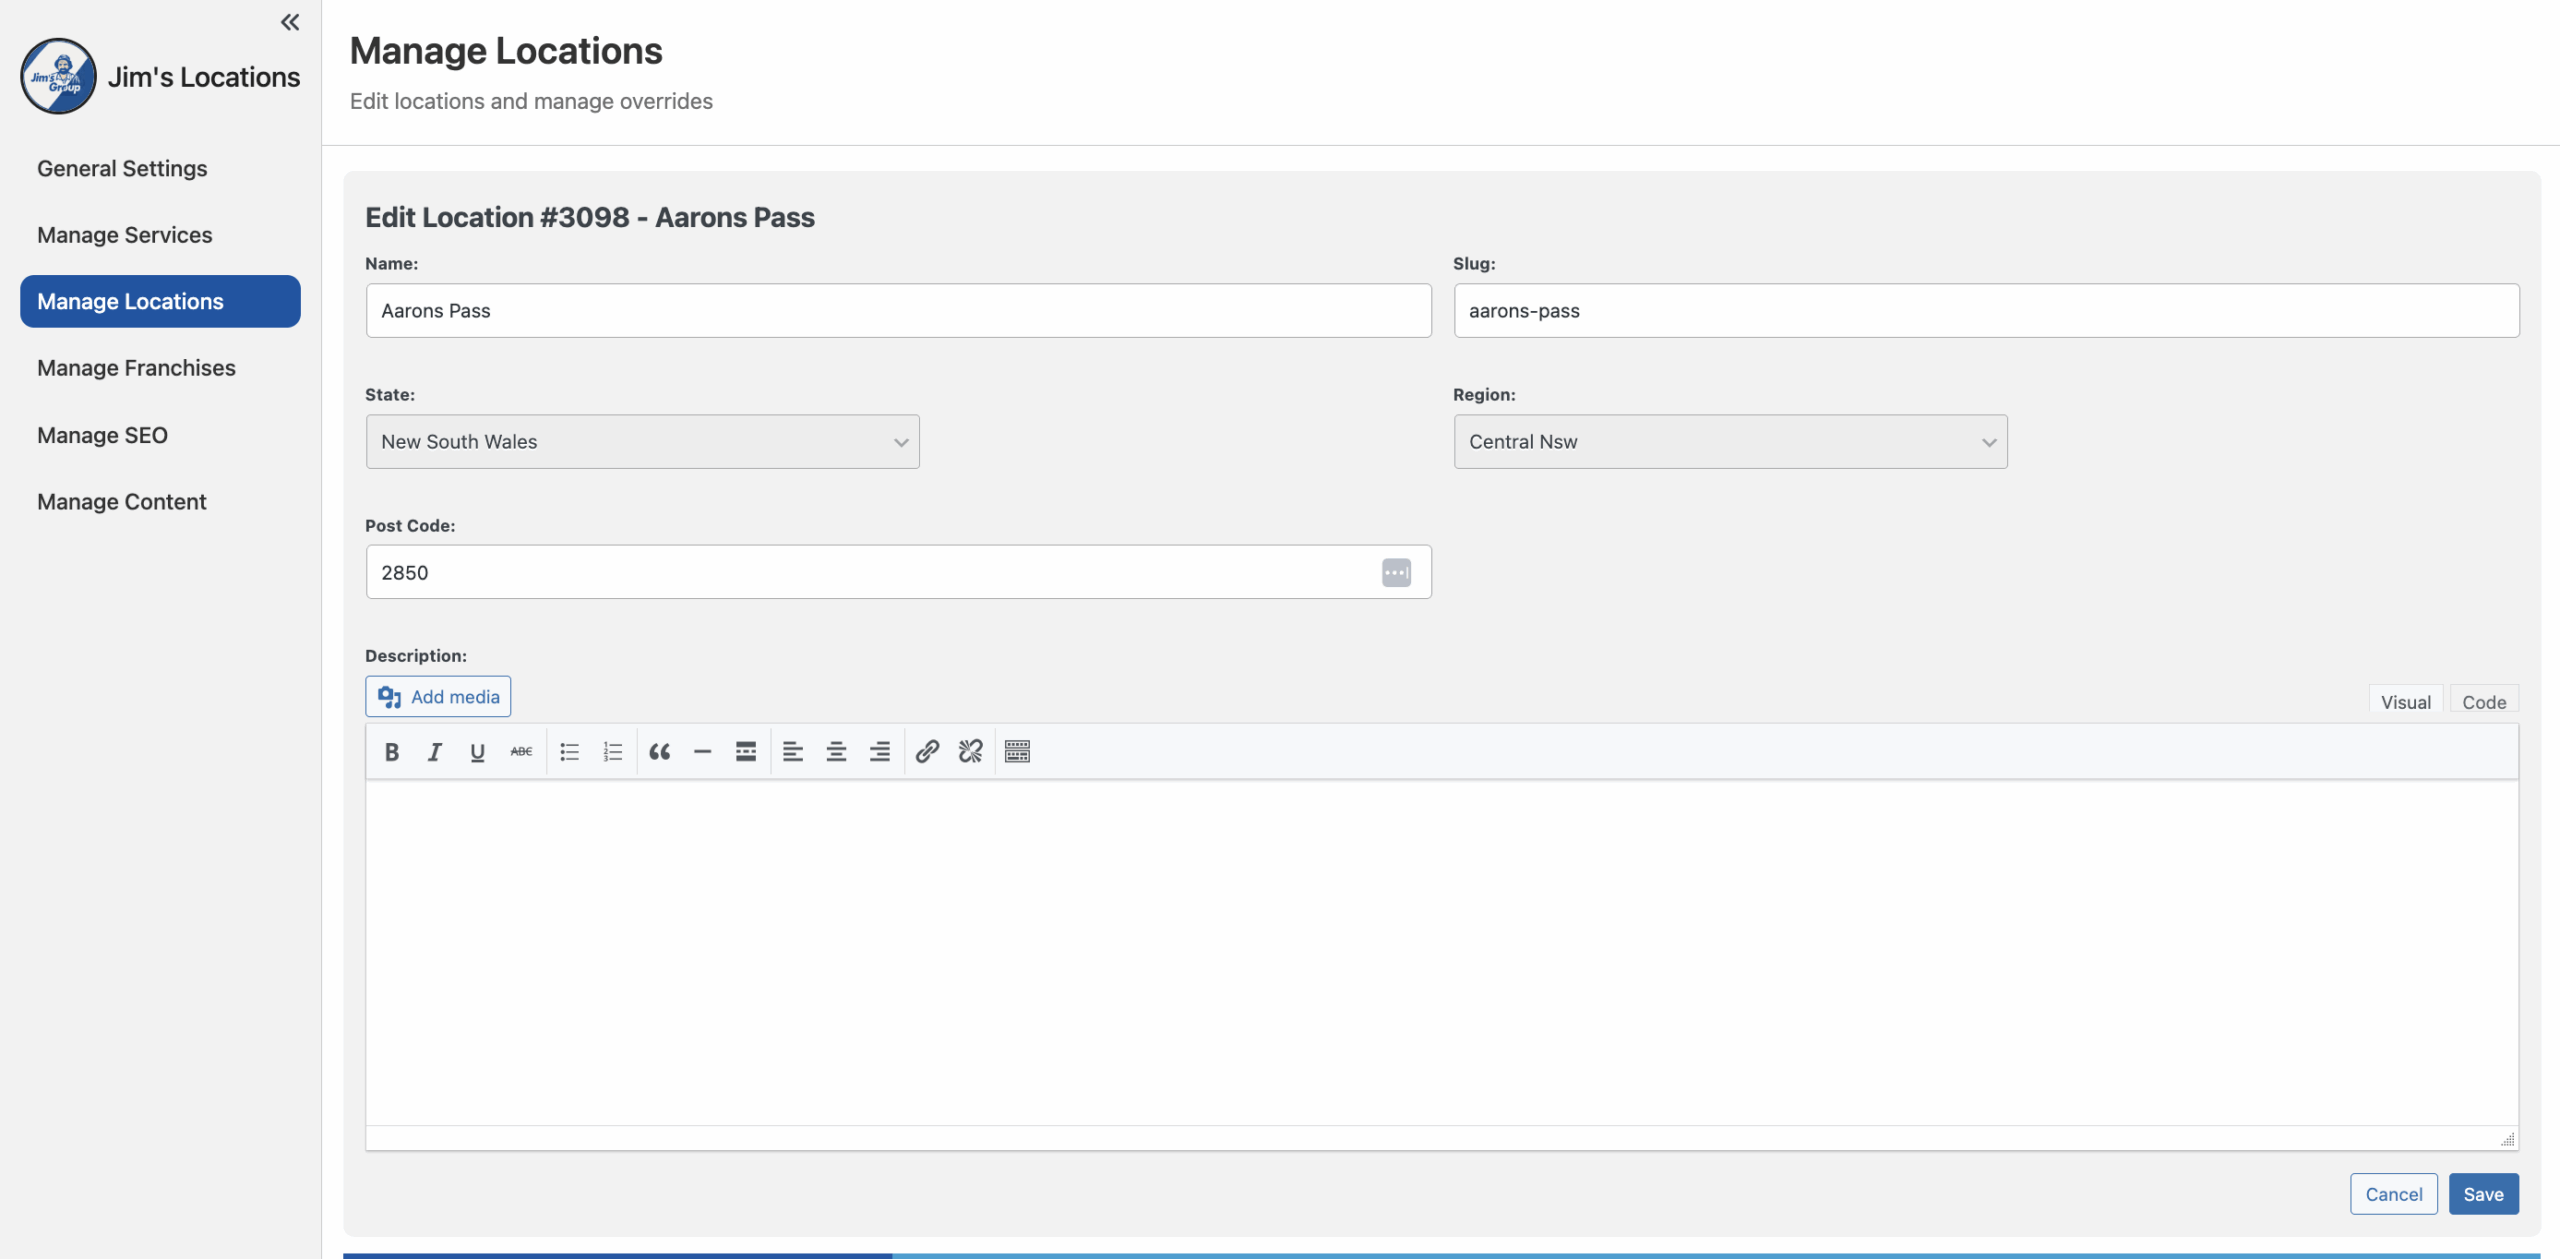
Click Save to apply changes, or Cancel to exit without saving.
Adding a New Location
When you click Add Location, you’ll be taken to a blank form where you can enter the details of the new location.
- Name – The display name of the location (e.g., Melbourne).
- Slug – The URL-friendly version of the name (e.g., melbourne). This will be automatically generated from the Name but can be changed.
- State – Select the state where the location is based.
- Region – Select the specific region (if applicable) within the chosen state.
- Post Code – Enter the location’s postcode.
- Description – Add any descriptive text about the location. You can also include media if required.
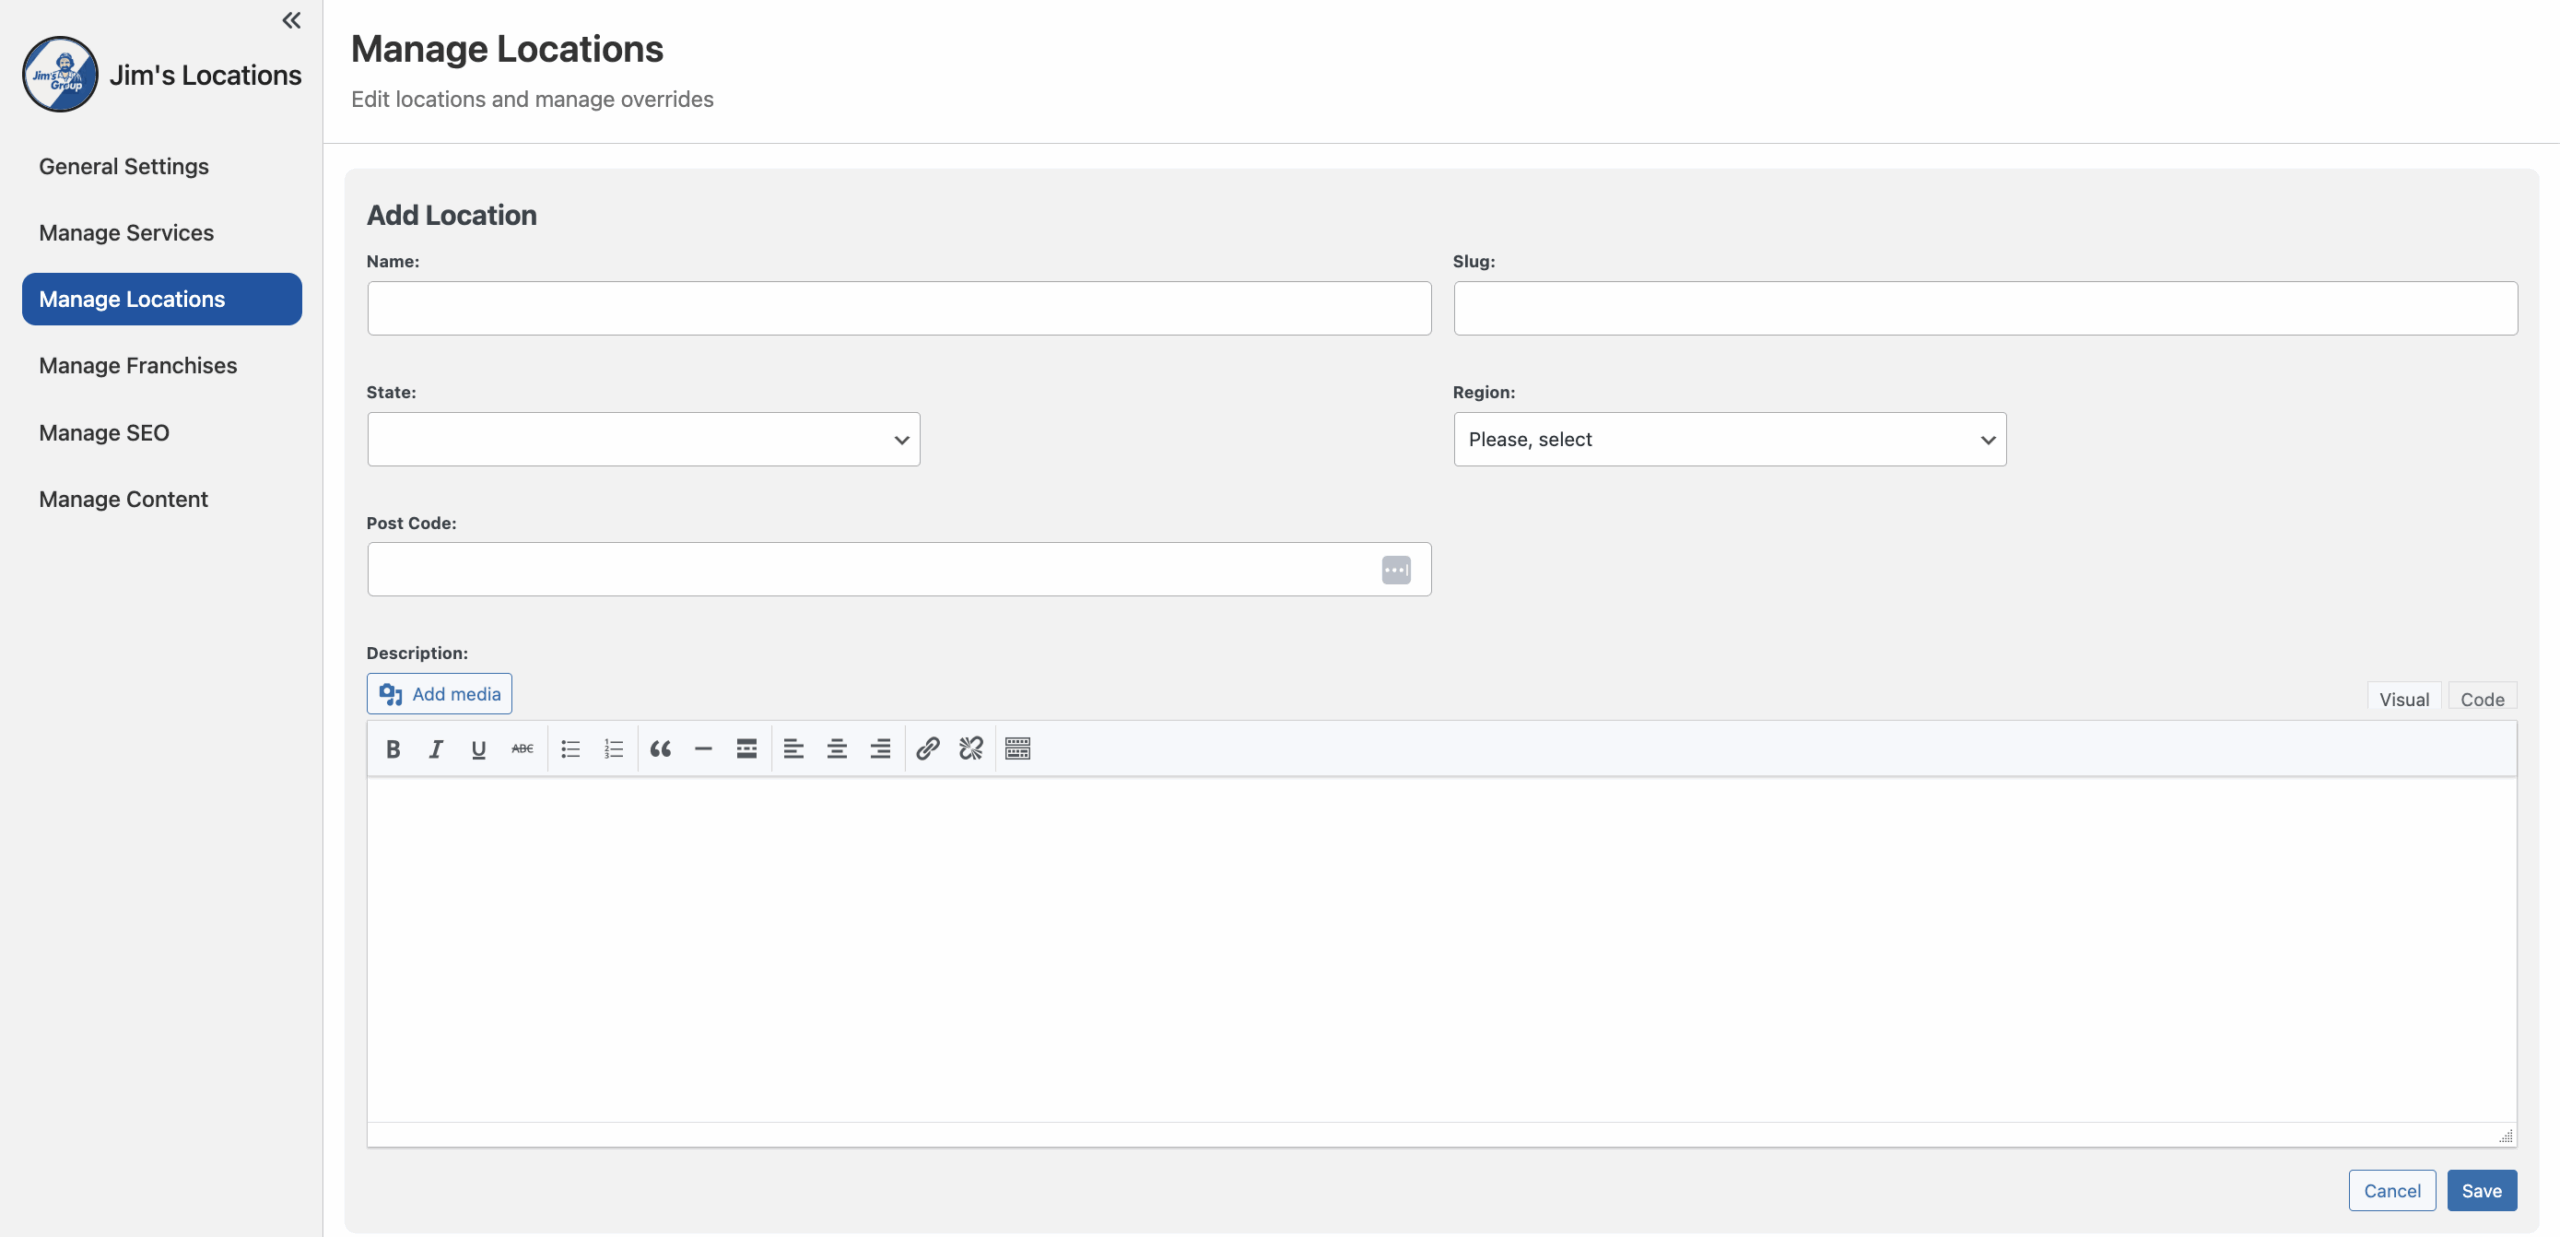
Once complete, click Save to create the new location.
Overriding a Location
Video Tutorial on overriding locations and franchises:
Override Content – Toggle to create a completely custom page.
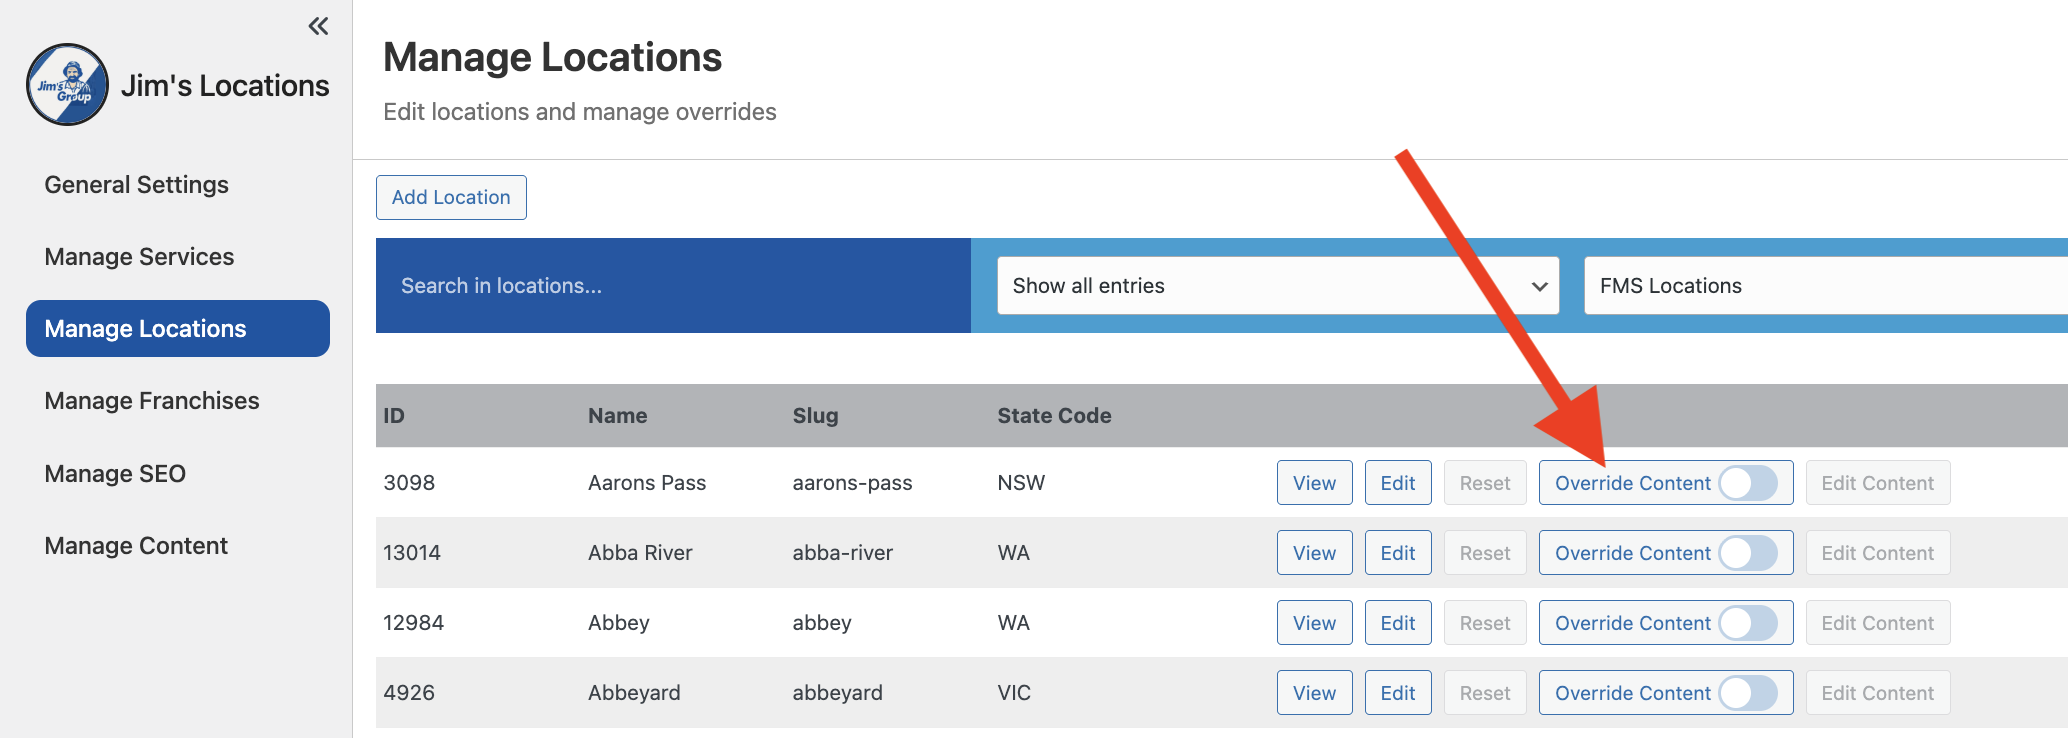
Click Edit Content to go and edit the completely custom page
4. Manage Franchisees
The Manage Franchises page lets you view, edit, and override details for each Jim’s franchisee. Most franchisee records are pulled directly from FMS (Franchise Management System), but you also have the ability to:
- Add new franchise entries manually,
- Override FMS-provided content,
- Mark franchises as “For Sale” to display them on the website.
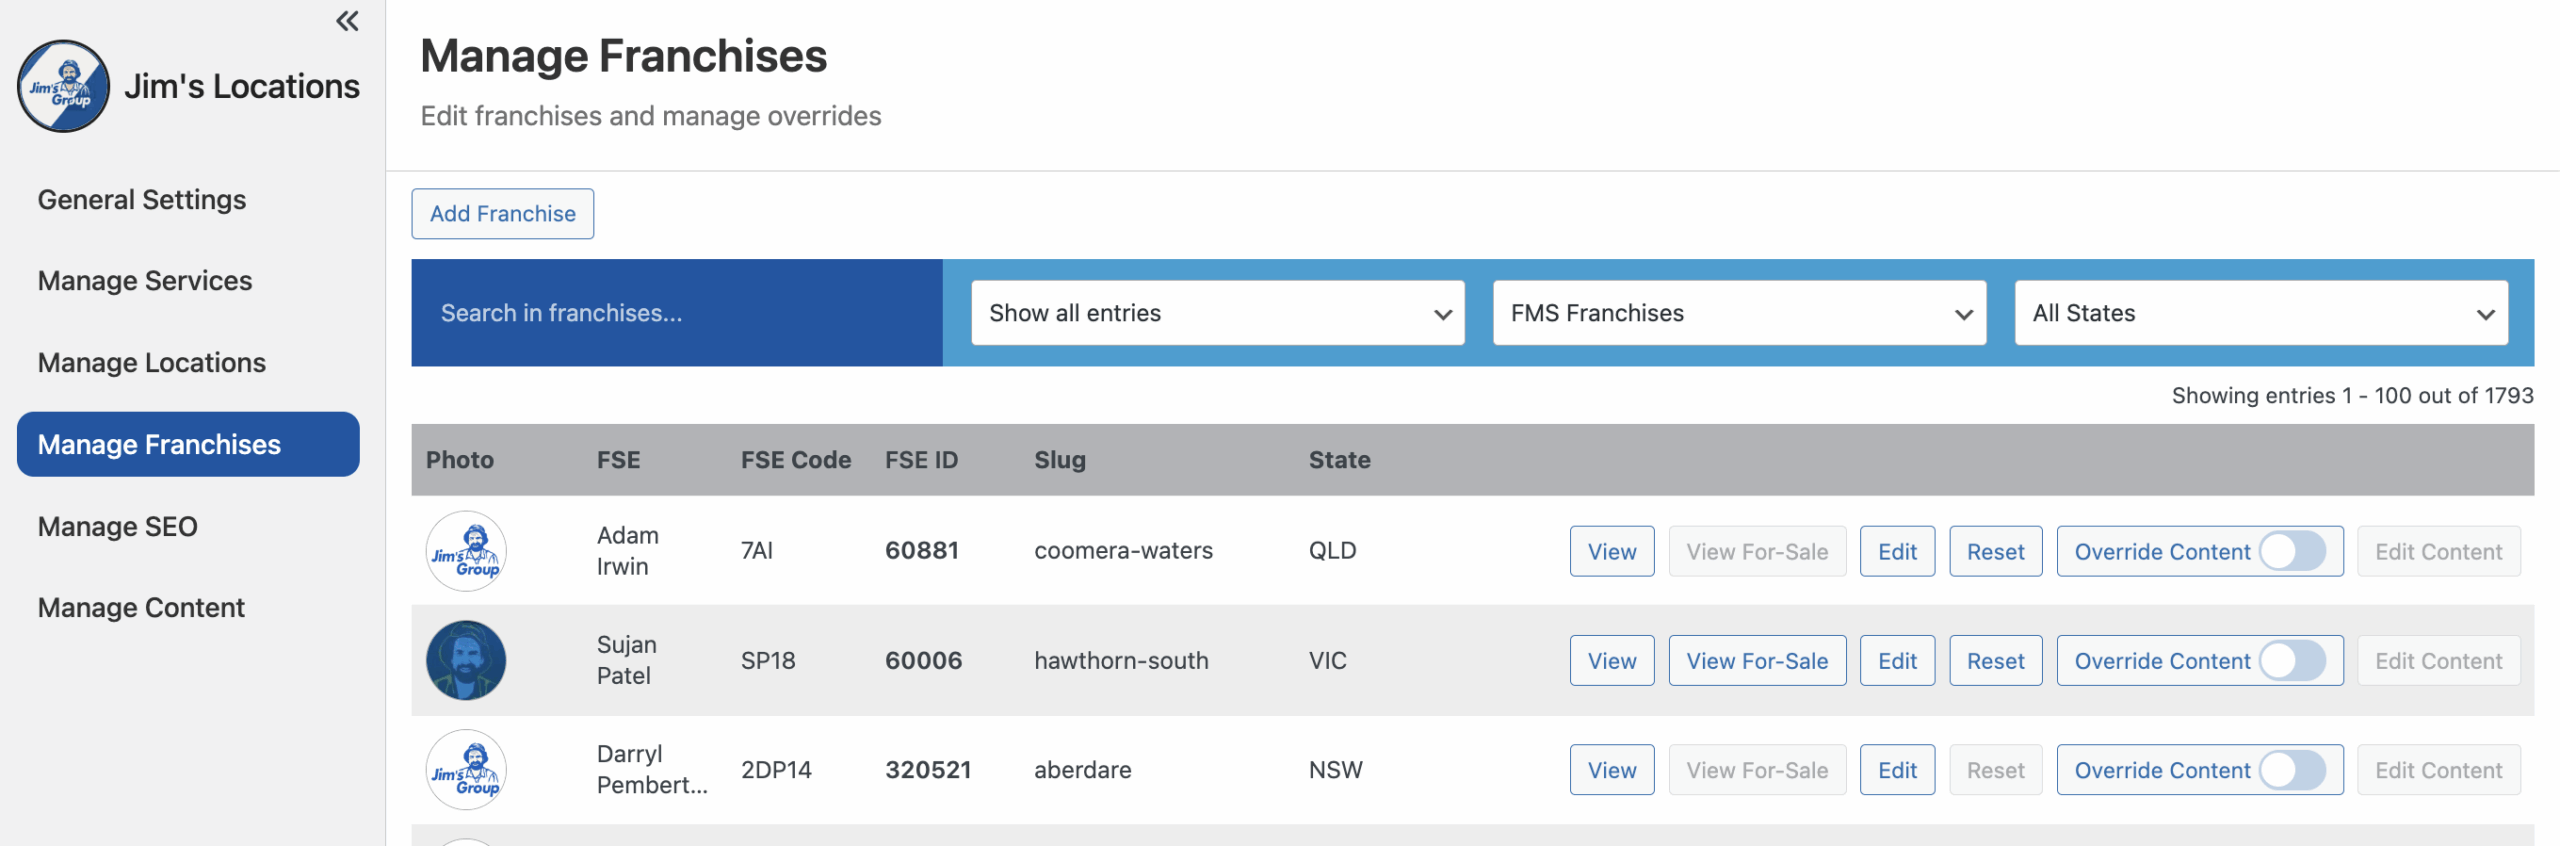
Actions per Franchisee
- View – Opens the live franchise page on the website.
- View For-Sale – If enabled, opens the dedicated “franchise for sale” page.
- Edit – Opens the franchise record for editing.
- Reset – Clears any overrides and restores the FMS default data.
- Override Content – Toggle to create a completely custom page.
- Edit Content – Opens the custom page for editing when Override Content is on
Filters & Search
- Search bar – Find a franchisee by name or slug.
- Show entries
- FMS / Manual – Choose to view only FMS-synced franchises, or manually added ones.
- States filter – Narrow results down by state.
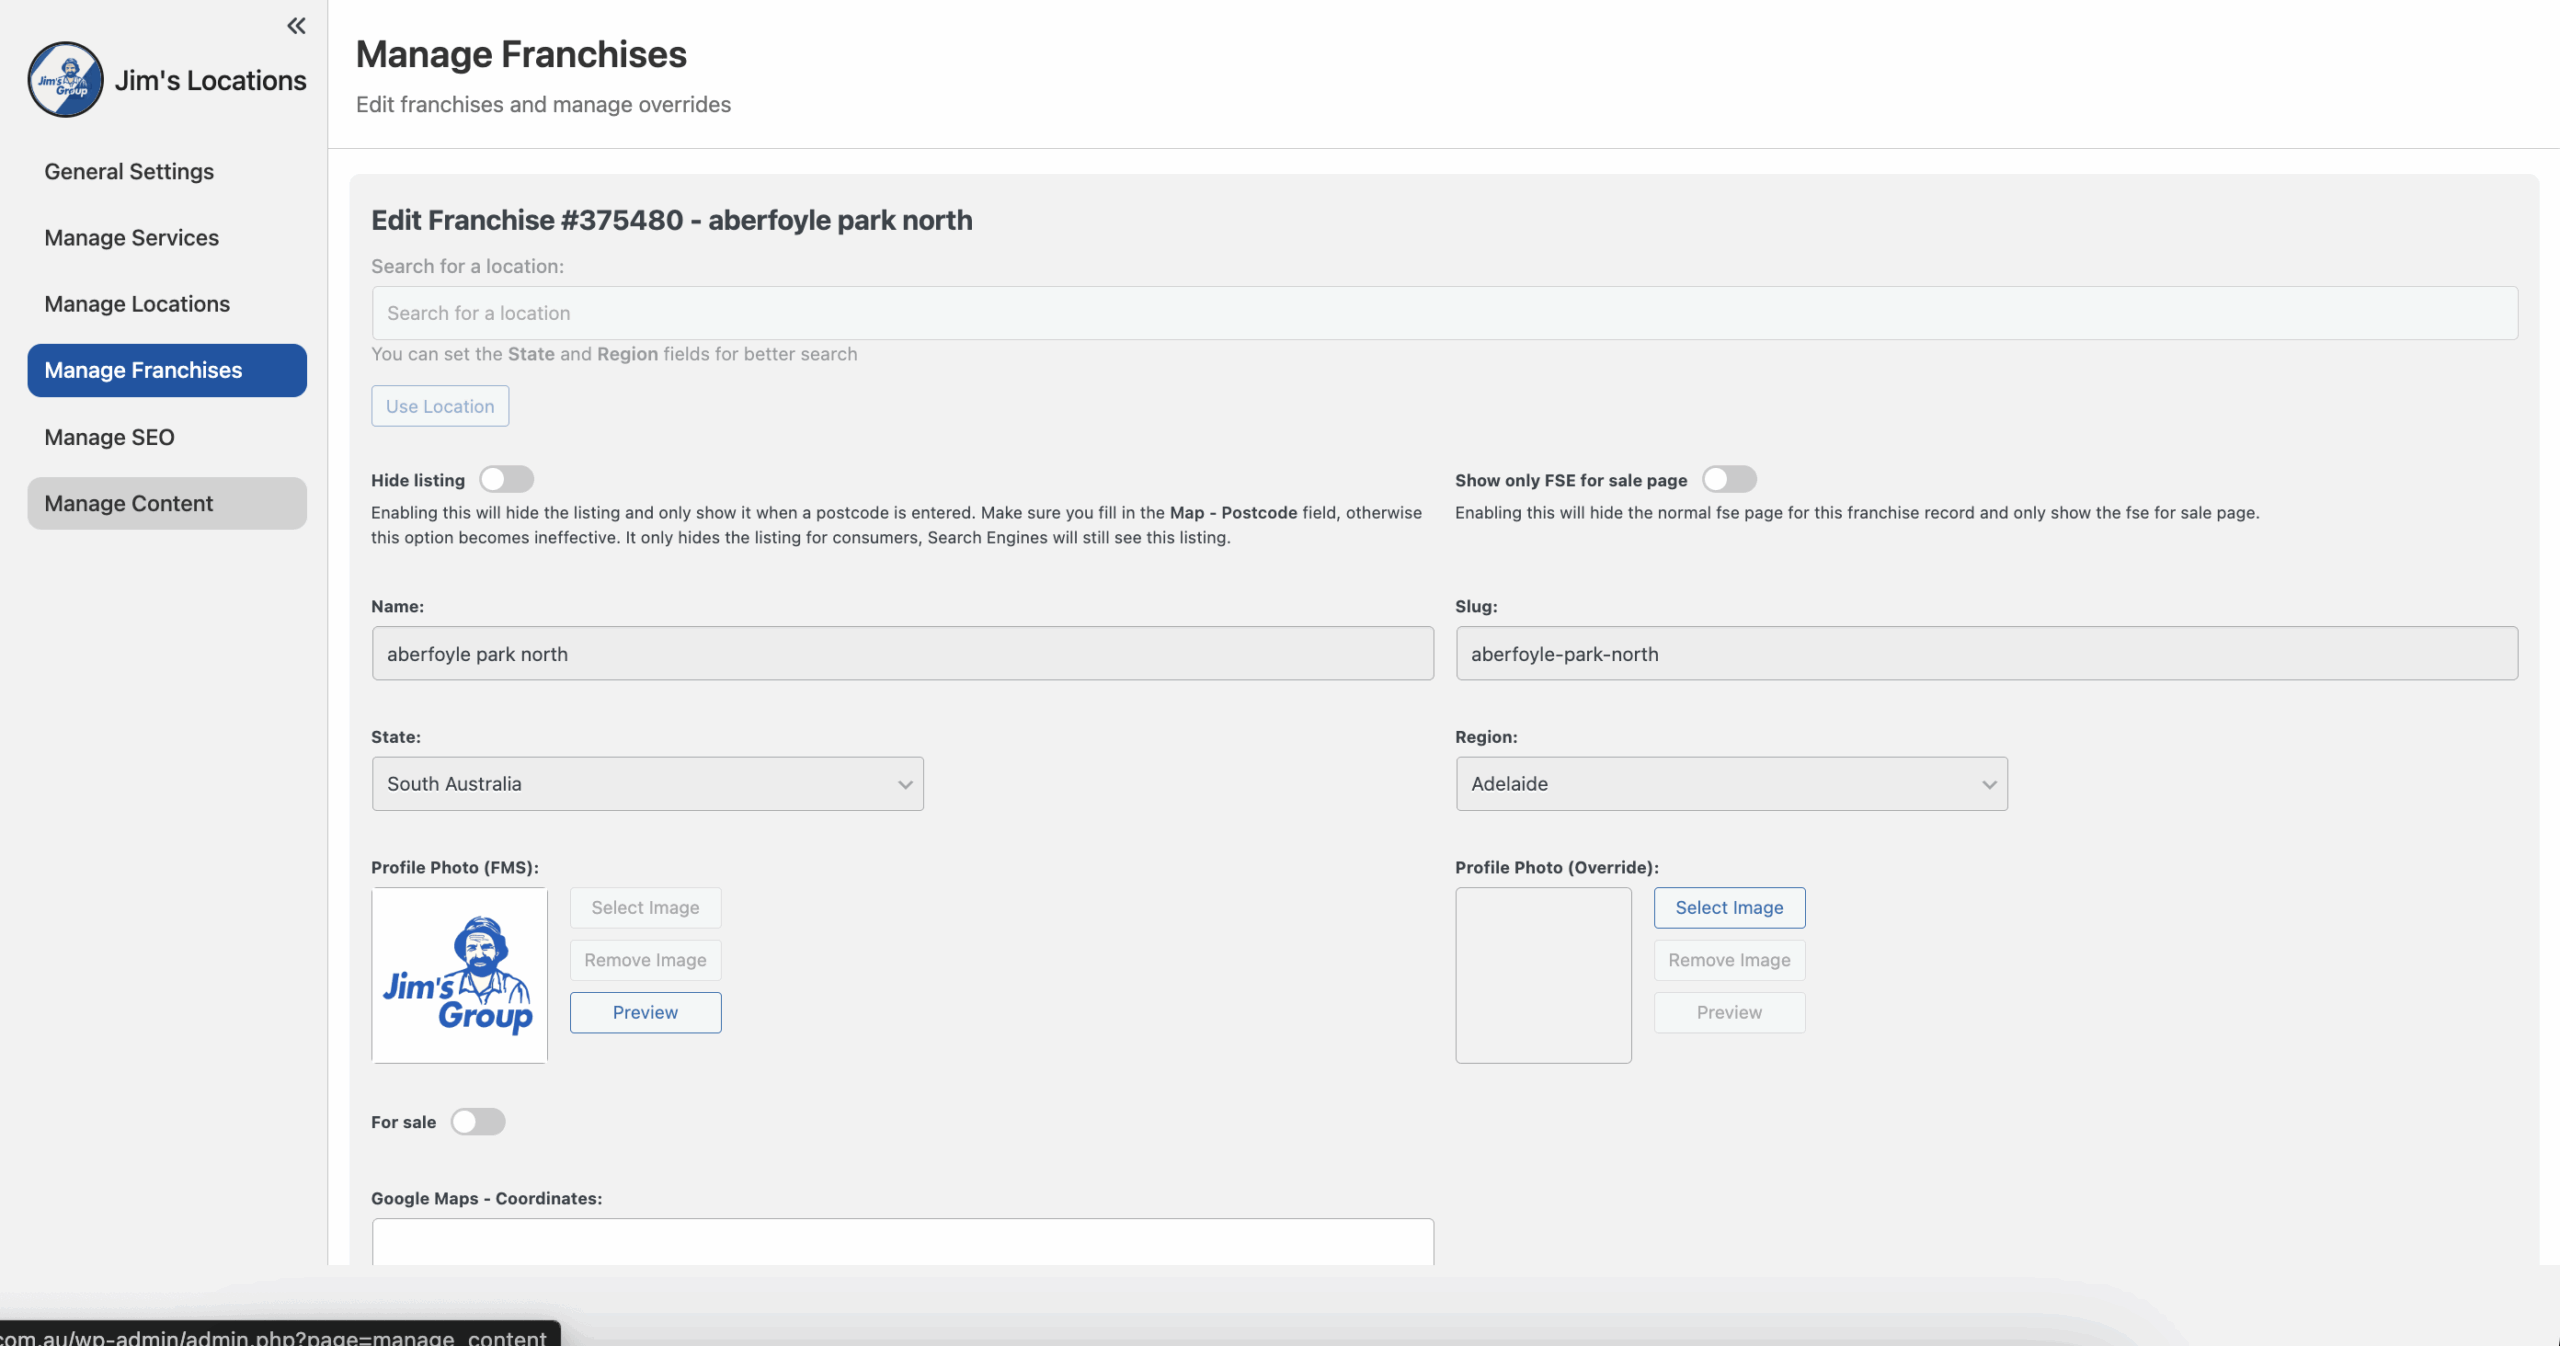
Adding a Franchise
Click Add Franchise to create a new record. You’ll see fields such as:
- Search for a Location – Helps assign the franchise to the correct state/region.
- Hide Listing – Hides the franchise from the website unless a postcode is searched (search engines still see it).
- Show only FSE for sale page – Replaces the normal franchise page with a “For Sale” version only.
- Name – The franchise name or franchisee name.
- Slug – URL-friendly text (auto-generated from the Name but editable).
- State / Region – Choose where the franchise belongs.
- Profile Photo (FMS) – Default photo pulled from FMS.
- Profile Photo (Override) – Upload a custom photo if you want to override the FMS one.
- For Sale toggle – Enable to add “Franchise For Sale” details (see below).
- Google Maps – Coordinates – Latitude and longitude (format:
-32.934316, 151.725781). - Description – Optional free text, with media upload support.
Click Save to publish the new franchise record.

Editing a Franchise
Click Edit next to a franchise to update its details. The fields are the same as when adding a franchise, but pre-filled with existing data.
Special options include:
- Hide Listing – Useful if a franchise should not be publicly shown.
- Override Photos – Replace FMS-provided images with your own.
- For Sale Section – Add sale information if the franchise is on the market.
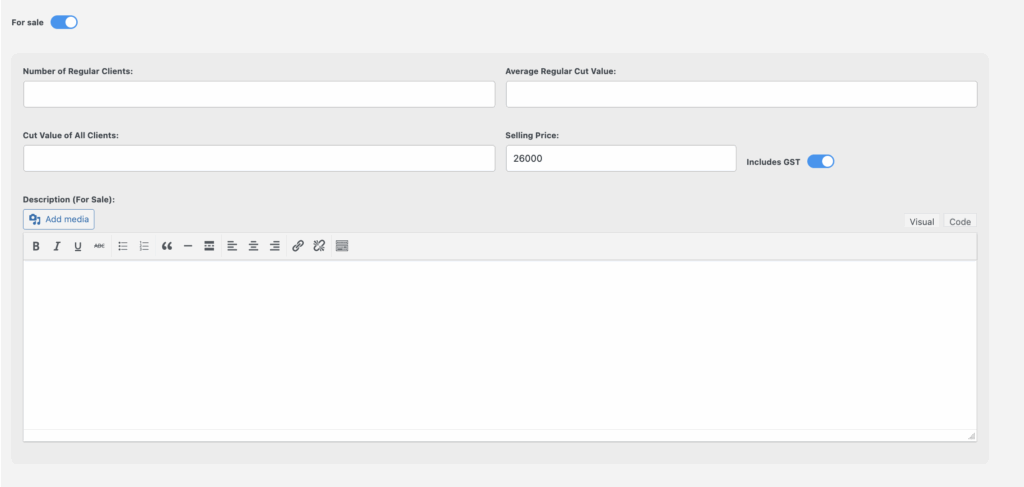
Franchise “For Sale” Settings
If you toggle For Sale, additional fields appear. These allow you to create a dedicated Franchise For Sale page on the website.
- Number of Regular Clients – Current active client base.
- Average Regular Cut Value – Average income per client.
- Cut Value of All Clients – Total combined value of all active clients.
- Selling Price – Asking price for the franchise.
- Includes GST – Checkbox if GST is included in the asking price.
- Description (For Sale) – Add detailed sales notes, features, or selling points.
Once filled, the system generates a Franchise For Sale page in addition to the standard franchise listing.
5.Manage Services
The Manage Services page allows you to view, add, edit, and organize the services your division offers. Services define what Jim’s franchisees provide to customers (for example, Lawn Mowing, Gutter Cleaning, or Carpet Cleaning). This page ensures that all service offerings are consistent across the website.
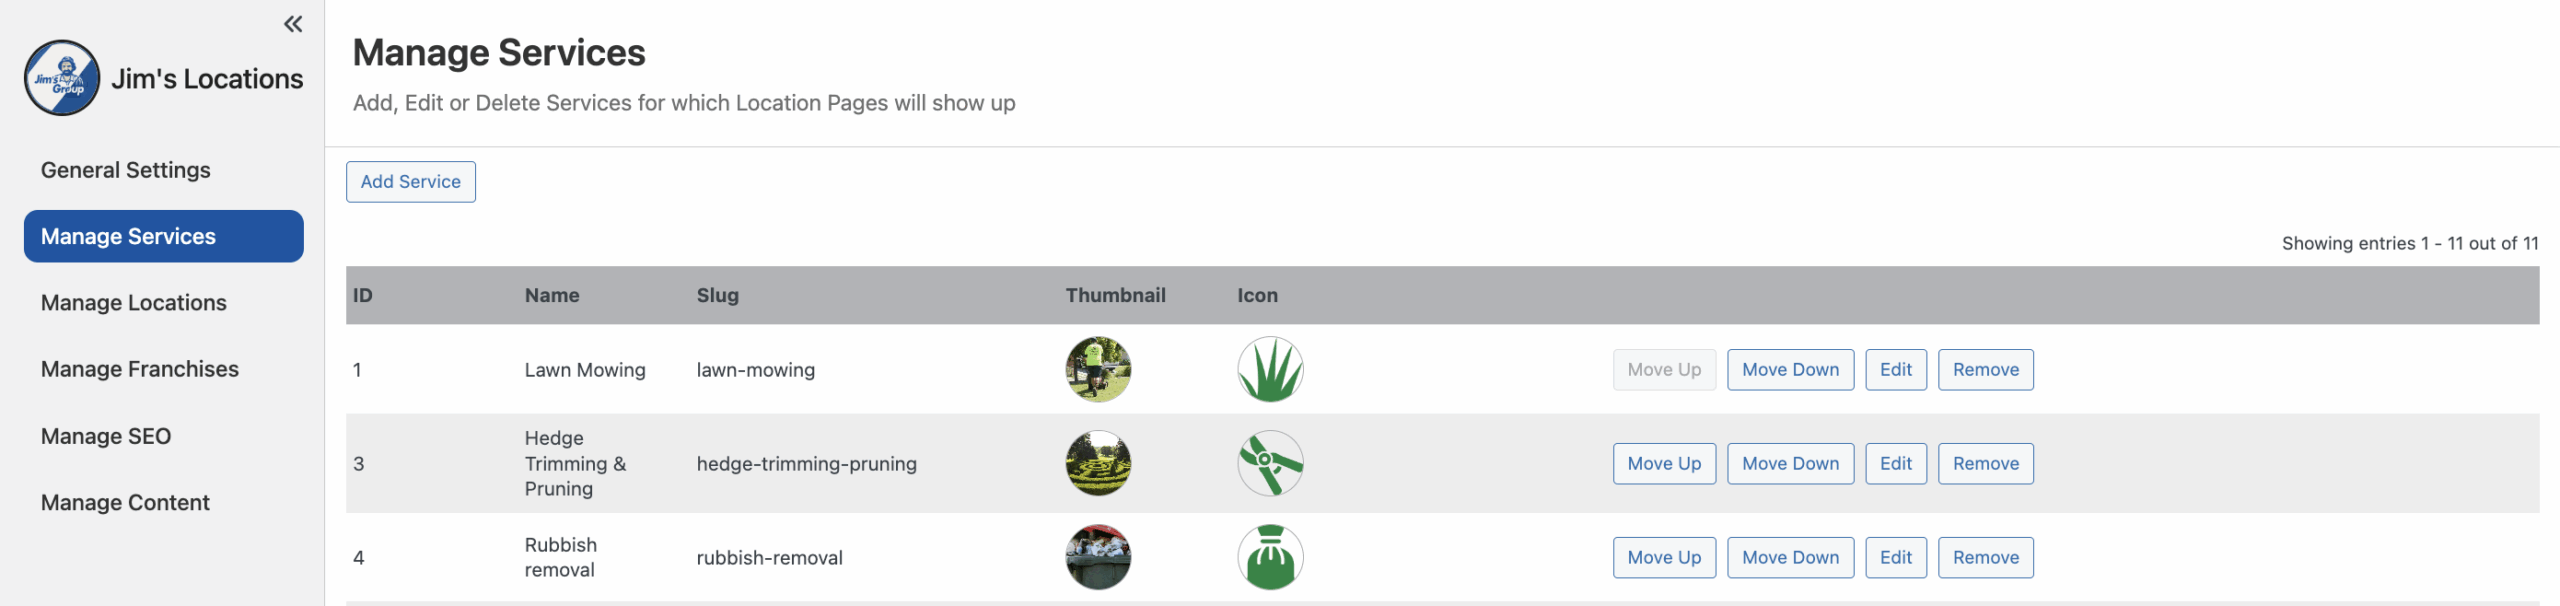
Adding a Service
Click Add Service to create a new service. The form includes:
- Name – Service name.
- Slug – Auto-generated URL version (editable).
- Thumbnail / Icon – Upload images for the service.
- Teaser / Description – Short and detailed text, supports media.
- Meta Title / Meta Description – Optional SEO information.
- FMS Service Assignment – Link to an FMS service.
- FAQs – Add frequently asked questions if needed.
Click Save to publish the service.
Editing a Service
Click Edit next to a service to update it. The form is identical to Add Service but pre-filled with the current details. You can change any field, update images, add Meta tags, assign an FMS service, or add FAQs. Click Save to apply changes.
Notes
- Name and Slug are required.
- Syncing with FMS ensures backend consistency.
- Use thumbnails and icons for visual clarity.
- Meta tags improve SEO but are optional.
6. Manage Content
The Manage Content page lets you edit variable text for different Jim’s page types. This content is used across the website to automatically generate unique combinations for suburb, service, and franchise pages, helping with SEO and avoiding duplicate content penalties.
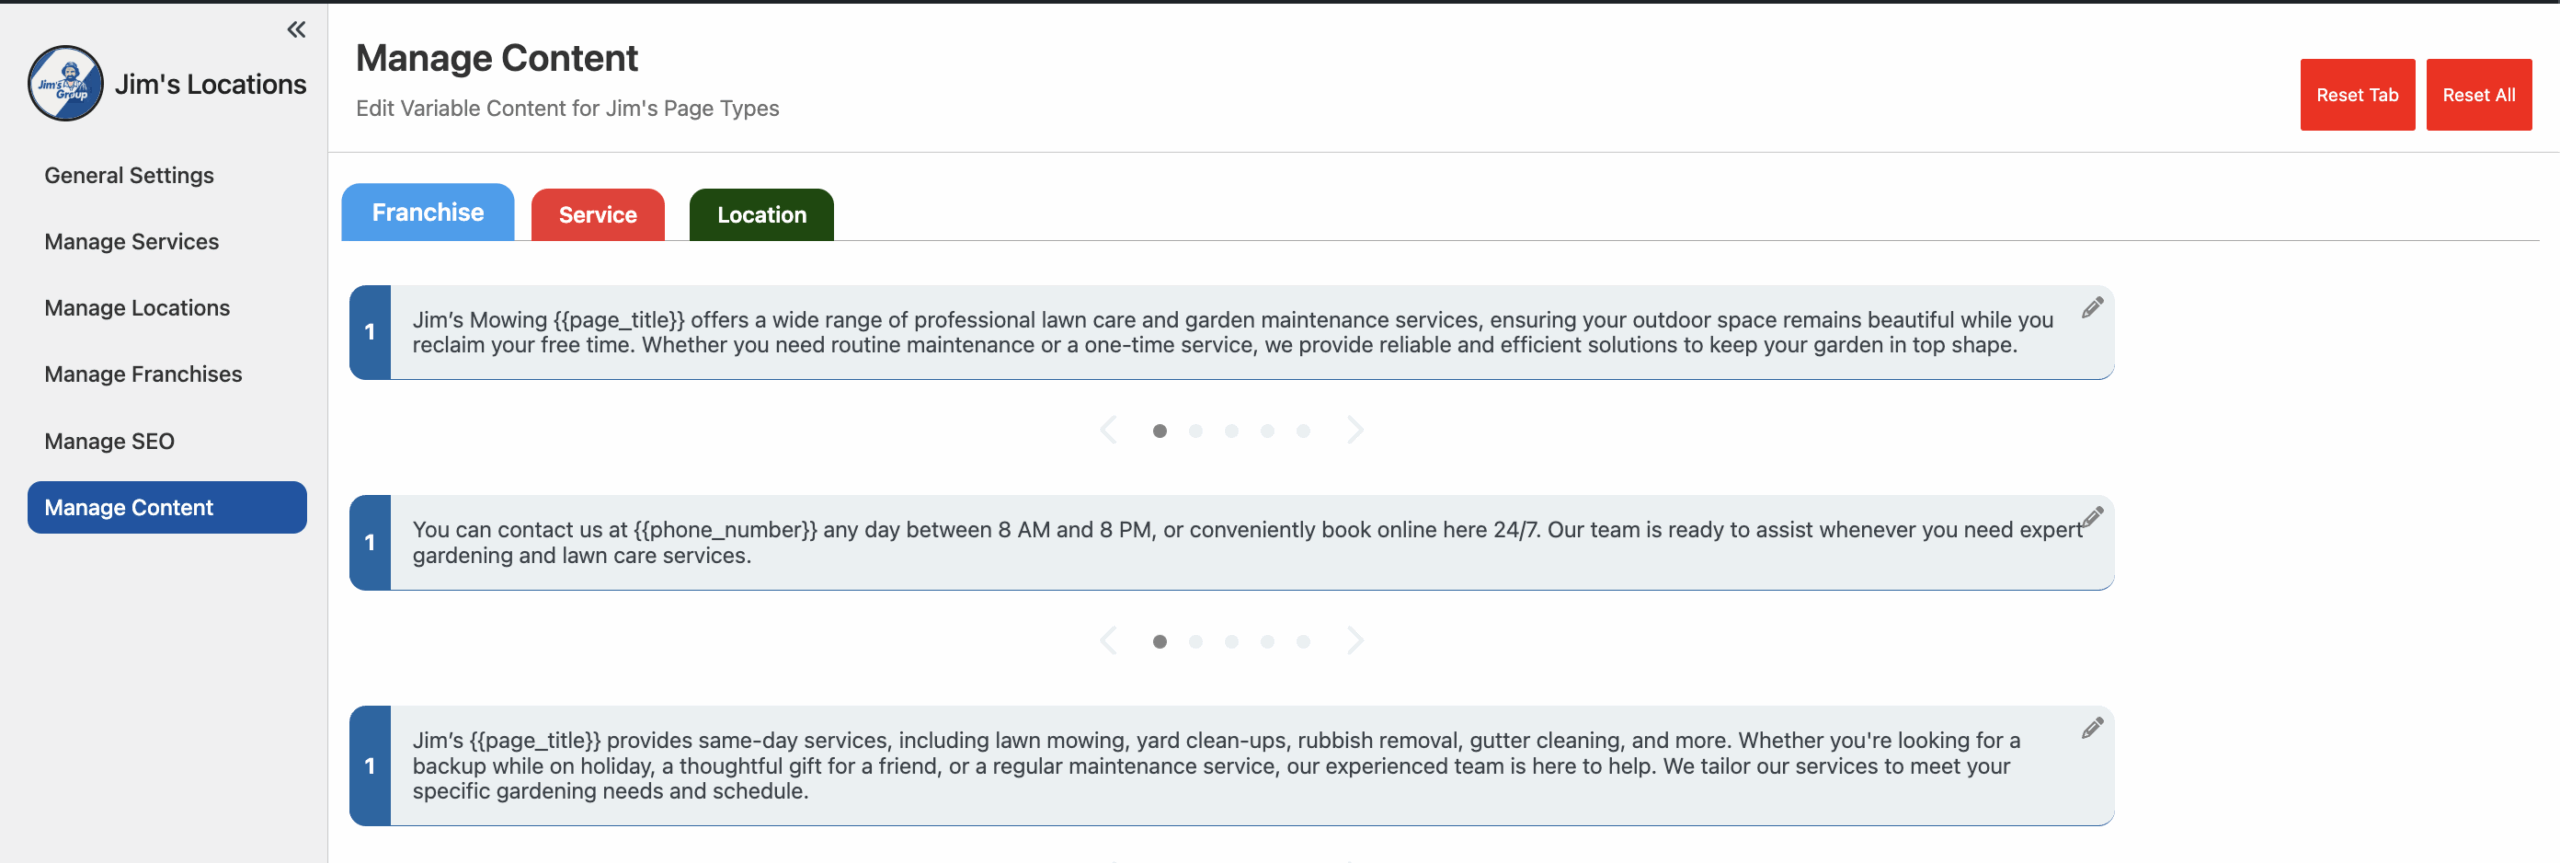
The page has three tabs, each corresponding to a type of page content:
- Franchise – Text templates used for franchise pages.
- Service – Templates for service pages (e.g., Lawn Mowing, Cleaning).
- Location – Templates for location-based pages (state, region, suburb).
Each tab contains 5 sets of 5 paragraphs, which are combined in different ways on the frontend to create thousands of unique content variations.
Editing Content
- Reset Tab – Resets all paragraphs in the current tab to their default text.
- Reset All – Resets every tab (Franchise, Service, Location) to default content.
- Paragraph Fields – Each paragraph can include placeholders like
{{page_title}}and{{phone_number}}, which are automatically replaced with the correct page title or contact number on the frontend.
How Content is Used
- The system takes the 5×5 paragraphs per tab and randomly combines them on the frontend.
- This generates thousands of unique page variations for each page type.
- These variations improve search engine crawling and reduce the risk of duplicate content penalties.
7. Manage SEO (Under Construction)
Last updated: Aug 22, 2025